In this post we are walking you step by step through the preparation of Ham di Pasku, or Christmas Ham and Ayakas. These dishes are inherently tied to the Holidays, so now you have the chance to serve an Antillian Christmas feast yourself.
Ham di Pasku
No Christmas party in the Netherlands Antilles is complete without some slices of Ham di Pasku. If you are lucky enough to find a butcher who offers a complete spiced or smoked ham you can start with preparation step #3 below.
Ingredients
- 1 small skinless ham [2 – 2.5 kg or 4 – 5 lbs.]
- 150 gr brown sugar [approximately 5.5 ounces]
- 4 tablespoons honey
- 1 l red wine [approximately 34 ounces]
- 1 large green pepper, rinsed, ribs and seeds removed, roughly chopped
- 5 bay leaves
- 1/2 bunch parsley, chopped
- 10 cloves
- 1 onion, peeled and roughly chopped
- 5 cloves garlic, peeled and sliced
- 1 small can pineapple rings
- 5 glacée cherries, halved
Preparation
- Add red wine to a large pot and bring to a boil. Add the ham, bell pepper, bay leaves, parsley, onion, garlic and brown sugar. Reduce heat and simmer for 1 hour.
- Remove ham and let it sit for 30 minutes.
- Preheat oven to 180°C [350°F].
- With a sharp knife, notch 10 small diamonds in the top of the ham and insert a clove into each diamond.
- Brush ham with the honey and cook in the oven for 45 minutes.
- Remove ham from the oven, remove cloves and garnish with pineapple rings and cherries. Cook in the oven for another 10 minutes until the pineapple and cherries are nice and glossy.
- Remove ham from the oven and allow to cool for at least 15 minutes before slicing and serving.
Tips for the Perfect Ham di Pasku
For many Antilleans, Ham di Pasku is the ‘Star of the Christmas Menu’. So what could be better than starting off December with these tips for turning out the most beautiful, best Ham di Pasku? We offer advice on everything from cutting and decorating tips to ideas for what you can do with those leftovers! Keep this list handy because it covers everything you could want to know in order to get the most out of your ham this Christmas!
Skin Removal and Incising
Nothing looks better than a beautifully presented ham. One way to improve the look of your ham is by practicing the proper technique of di pasku incision.
- Cut a zigzag pattern around the leg to remove excess fat.
- Slide your knife under the skin and pull it off in one piece if possible.
- Using a sharp knife, cut diamonds in the fat of the ham instead of in the flesh (hint: if you see red, then you have cut too deep).
Decorating the Ham
Proper decorating can transform your ham into a beautiful piece of art that makes for a stunning dinner table.
- Remove the skin as described in tip #1 above.
- Cut a gingham pattern of 10 diamonds in the fat of the ham as described in tip #1 above.
- Using a skewer make a hole in each diamond and place a clove into each hole.
- If you want to garnish the ham with pineapple rings and cherries, it’s best to do so and then bake the ham another 15 minutes to allow the fruit to maintain its beautiful color.
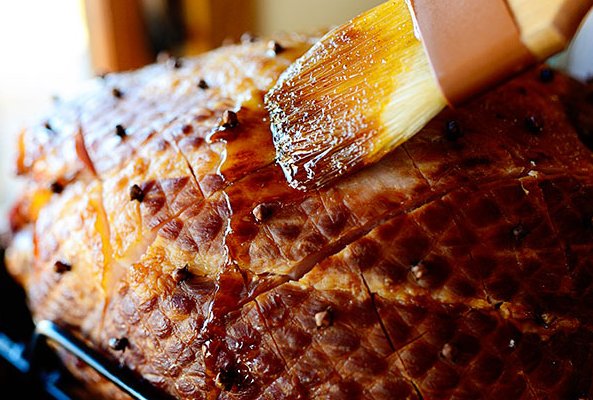
Glazing the Ham
A nice layer of glaze on any ham give is not only more flavor but a more beautiful appearance. Whether you choose a honey-mustard based glaze or one featuring rum and ginger, a proper glaze is a key step in making a beautiful Ham di Pasku.
When glazing a ham, it is best to elevate the ham by placing it on a rack and then place the rack on a baking sheet. Brush the ham with your chosen glaze several times throughout baking, approximately every 15 minutes. This ensures that you get a nice even coat of glaze on your ham.
Glaze selection tip: Flavors that goes well with ham include orange, apricot, cranberry, honey and mustard.
Serve Hot or Cold?
You can serve your glazed ham hot or cold, the choice is yours. You can set the cold glaze aside while the ham cooks, then glaze and eat. Or you can glaze the ham every 15 minutes while it cooks in the oven.
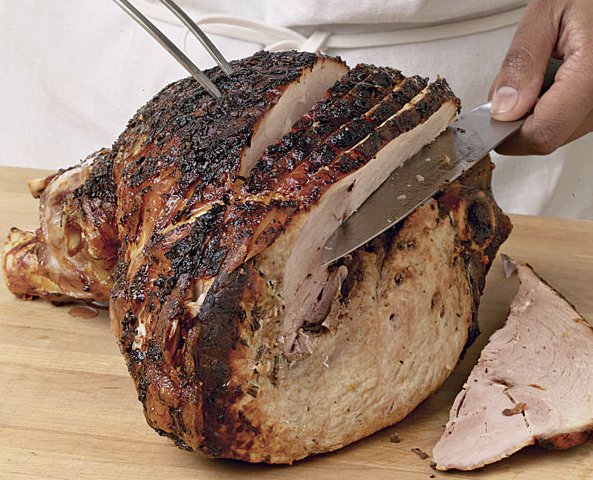
Cutting the Ham
These steps outline how to properly cut or slice your ham for serving.
- Cut 2 or 3 slices (parallel to the length) of the thin part of the ham and then place the remaining ham on a flat area, such as a cutting board.
- Stick your meat fork firmly to the end of the leg. Now cut slices of ham to the desired thickness making sure to cut all the way down to the bone.
- Make one more cut along the bone to cut cleanly separate the slices.
Got Leftovers?
DON’T THROW AWAY those Christmas dinner leftovers! Leftover Ham di Pasku can easily be used in a pasta salad, in a breakfast omelet or a number of other delicious dishes.
Storing Your Ham
Of the many suggestions for storing your Christmas ham, we like wrapping the ham in an old tea towel or pillowcase that has been soaked in water and wrung out and then placing the ham in the refrigerator. This helps keep the ham moist so that even a few days later it is still as good as when you took it out of the oven.
How Long Will Your Ham Keep?
This largely depends on how you store the ham. If you store your cooked ham in the freezer, it will remain good for approximately 2 months. If you store your cooked ham in the refrigerator, it will remain good for 3 to 5 days.
Yes, You CAN Re-Freeze!
The great thing about ham is that you can buy it frozen, then cook it by boiling or baking and then re-freeze the leftovers. Meat that is cooked first can easily be re-frozen. What you must NOT do, however, it is thaws frozen meat and then refreezes it without cooking it first.
What Do I Do With the Bone?
Don’t throw it away! You can store it in the refrigerator or freezer until you’re ready to make a post of a tasty pea or sweetcorn soup. A raw ham bone will add even more flavor to your soup!
Ayaka
Ayaka are small packets of corn flour filled with vegetables and meat. This delicacy is wrapped in banana leaves and cooked. Originally from Venezuela, Akaya is a popular Christmas time dish in the Dutch Antilles. The following recipe yields 15 pieces of Akaya.
Ingredients
For 15 ayakas
Dough
- 5 cups water
- 4 cups yellow Harina P.A.N. corn flour
- 2 teaspoons salt
- 1 teaspoon cumin powder
- 1 teaspoon sugar
- 4 tablespoons chicken gravy
Filling
- 1 whole chicken (in parts)
- 150 ml [approximately 5 ounces] water
- 70 gr [approximately 2.5 ounces] tomato puree
- 50 gr [aproximately 2.0 ounces] butter
- 1 chicken bullion cube
- 1 clove garlic (pressed)
- 1 tablespoon Worchestershire sauce
- 1 chili pepper (rinsed, seeds removed, sliced into rings)
- 1 teaspoon curry powder
Extras
- 50 gr [approximately 2 ounces] seedless grapes (rinsed, halved, finely chopped)
- 50 gr [approximately 2 ounces] plums (rinsed, halved, finely chopped)
50 gr [approximately 2 ounces] olives (halved, finely chopped) - 2 red peppers (rinsed, ribs and seeds removed, sliced into thin strips)
- 2 onions (peeled, finely chopped)
- 15 banana leaves
Preparation
- Heat the butter in a pan and fry the chicken until golden brown.
- Dissolve the chicken bouillon cube in the water and add it to the frying pan.
- Mix together the tomato puree, pressed garlic, Worchestershire sauce, chili pepper rings and curry powder and add to the pan. Braise the chicken for about 40 minutes until fully cooked.
- Allow the chicken to cool and remove the meat from the bone in small pieces. Set chicken aside.
- Mix the cornflour with the water, salt, cumin, sugar and orange juice. Knead the dough until it is the desired consistency. Add more water or cornflour if needed.
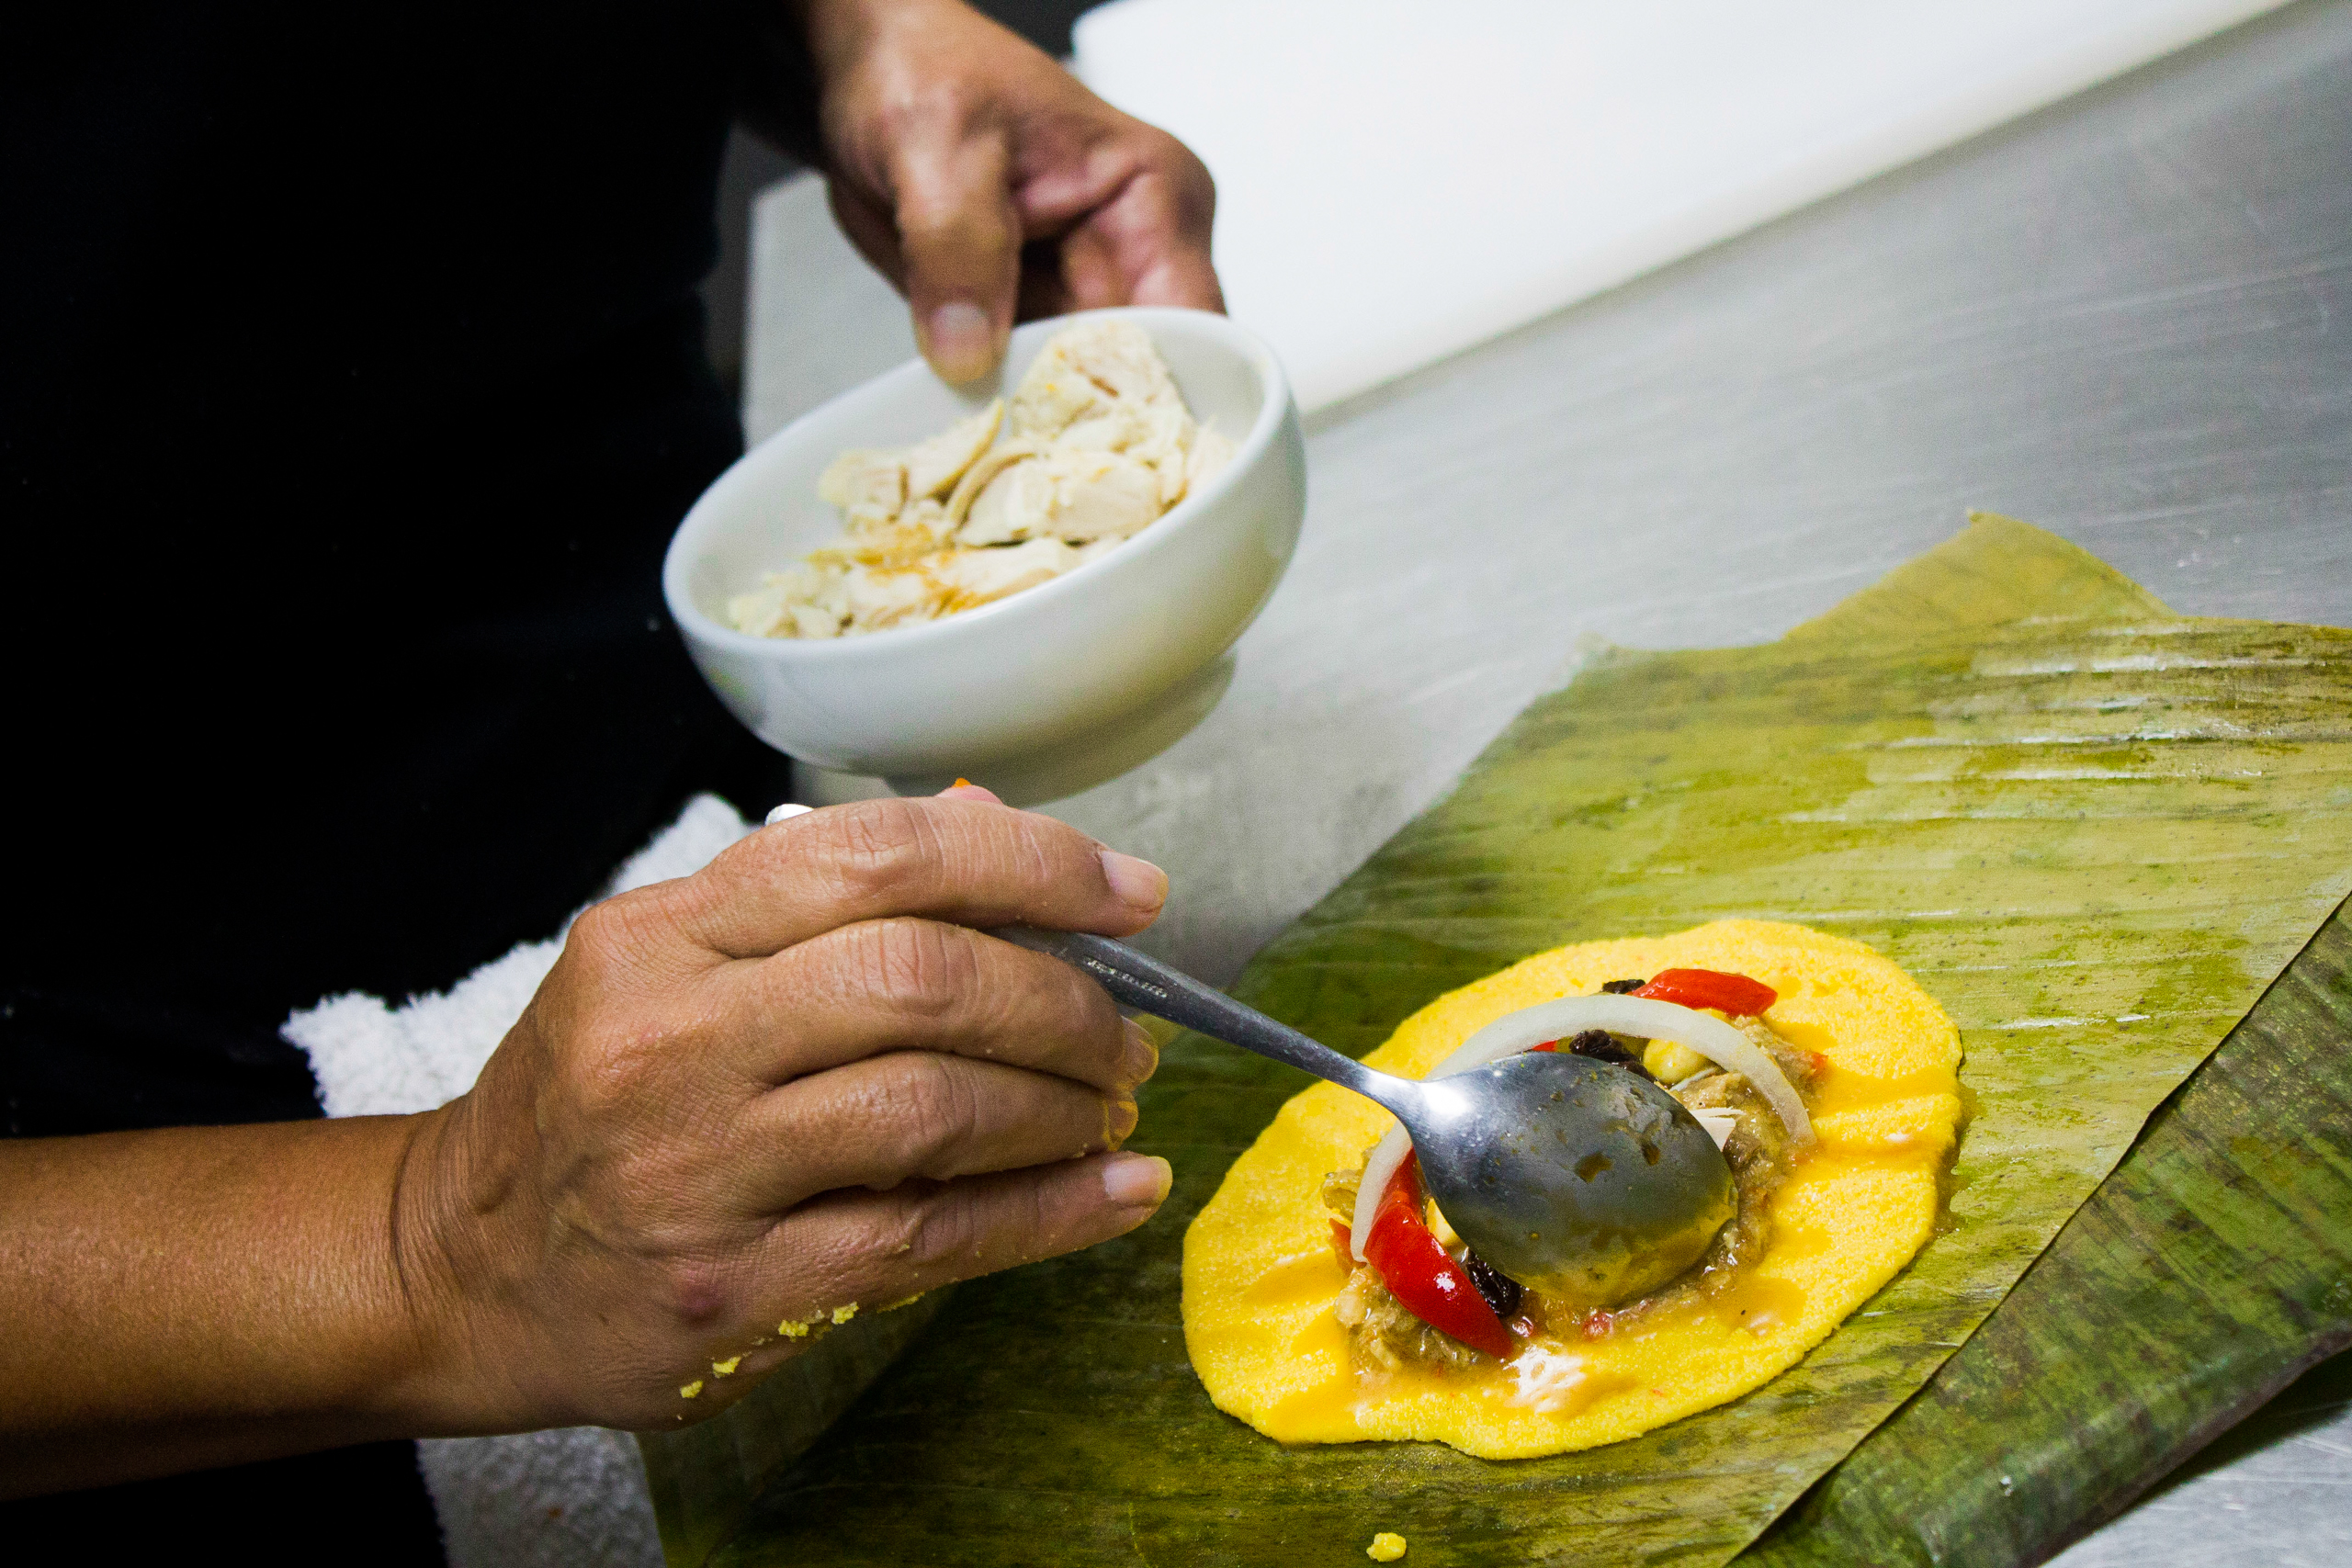
- Spread some dough on a banana leaf. If you are unable to find banana leaves you can possibly substitute aluminum foil.
- Place a tablespoon of the braised chicken in the center of the dough and then add som grapes, olives, plums, onion and red pepper strips. Fold the dough and banana leaf over the filling like a closed handkerchief, completely enclosing the filling.
- Secure the akayas with string (vertically and horizontally). Boil for 1 hour in a large pot filled with water.
- Remove akayas from the pot, remove string and banana leaves and serve.
Enjoy your ayakas!
“Kome dushi!”
– Jurino
This recipe was originally posted in Dutch on Antilliaans Eten and has been reposted and translated with Jurino’s permission.